
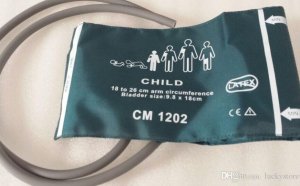
Picture of Blood pressure cuff
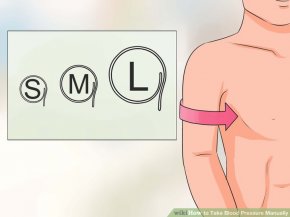 Verify that you have the right cuff size. A standard size blood pressure cuff purchased from a drugstore will fit around the arm of most adults. However, if you have an especially narrow or wide arm, or if you plan to take the blood pressure of a child, you may need a different size.
- Check the size of a cuff before buying it. Look at the "index" line. This is the range line on the cuff that tells you if it fits. Once it is on the patient's arm it will tell you whether or not the circumference of your arm fits within the "range" area of the cuff.
- If you do not use the proper cuff size, you may end up with an inaccurate measurement.
- Factors that can affect blood pressure include: stress, smoking, exercise, cold temperatures, a full stomach, a full bladder, caffeine, and some medications.
- Blood pressure can change throughout the course of the day. If you need to check the patient's blood pressure regularly, try to do so at the same approximate time each day.
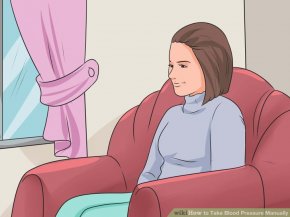
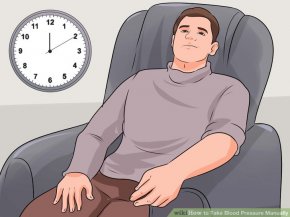
Find a quiet place. You will need to listen your, or your patient's heartbeat, so a quiet setting is ideal. A quiet room is also a calm room, so someone who rests in a quiet room while checking his or her blood pressure is more likely to feel relaxed, rather than stressed. Therefore you are more likely to get an accurate reading.
Get comfortable. Since physical stress can affect a blood pressure reading, you or the patient whose reading you take, should get comfortable. For example, use the bathroom before you have your blood pressure taken. It's also a good idea to keep yourself warm.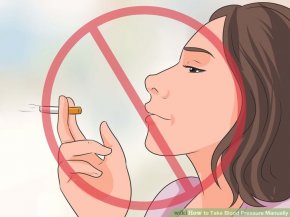 Find a warm room, or if the room is chilly, wear an extra layer of clothing to keep warm.
- In addition, if you have a headache or body ache, try to reduce or relieve the pain before taking your blood pressure.
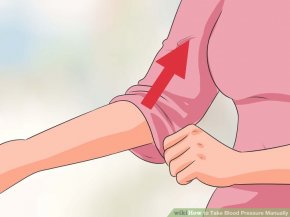
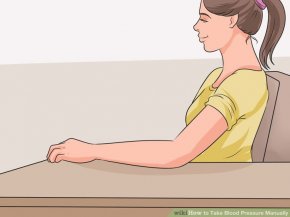
Remove tight sleeves. Roll up your left sleeve or, better yet, change into a shirt that exposes your upper arm. Blood pressure should be measured from the left arm, so the sleeve should be removed from the upper left arm.
Rest for 5 to 10 minutes. Resting will assure that your heart rate and blood pressure have the chance to stabilize before the measurement is taken.
Find a comfortable and appropriate location to take your blood pressure. Sit in a chair next to a table. Rest your left forearm on the table. Position your left arm so that it rests at about heart level. Keep the palm of your hand facing up.- Sit up straight. Your back should be against the back of the chair and your legs should be uncrossed.
Part 2
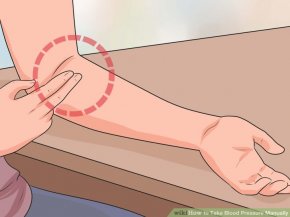
Positioning the Blood Pressure Cuff- Locate your pulse. Place your index and middle fingers over the inside center of your inner elbow.
 When you press lightly you should be able to feel the pulse of your brachial artery from this position.
- If you have difficultly locating your pulse, place the head of the stethoscope (the round piece at the end of the tube) in the same general area and listen until you can hear your heartbeat.
- Wrap the cuff around your arm. Tuck the cuff end through the metal loop and slide it onto your upper arm. The cuff should be roughly 1 inch (2.5 cm) above the bend of your elbow and should be evenly tight around your arm.
- Make sure that your skin is not pinched by the cuff as you wrap it securely. The cuff should have heavy duty velcro on it, which will hold the cuff closed.
- Check the tightness of the cuff by slipping two fingertips underneath. If you can wiggle the two fingertips under the top edge but cannot wedge your full fingers beneath the cuff, the cuff is tight enough. If you can wedge your full fingers under the cuff then you need to open up the cuff and pull it tighter before closing it again.
- Slide the head of the stethoscope under the cuff. The head should be face down, with the wide part of the chest piece in contact with the skin. It should be positioned directly over the pulse of your brachial artery that you found earlier.
- Also place the stethoscope earpieces in your ears. The earpieces should face forward and point toward the tip of your nose.
- Position the gauge and the pump. The gauge needs to be positioned where you can see it. Hold the gauge lightly in the palm of your left hand if taking your own blood pressure. If taking someone else's blood pressure, you can hold the gauge in whatever position you want as long as you can see the face of the gauge clearly.
 You should hold the pump in your right hand.
- Turn the screw on the pump bulb clockwise to close the airflow valve, if necessary.
Part 3
Measuring Your Blood Pressure- Inflate the cuff. Rapidly squeeze the pump bulb until you no longer hear the sound of your pulse through the stethoscope. Stop once the gauge reads 30 to 40 mmHg above your normal blood pressure.
- If you do not know your normal blood pressure, inflate the cuff until the gauge reads between 160 to 180 mmHg.
- Deflate the cuff. Open the airflow valve by twisting the screw counterclockwise. Let the cuff deflate gradually.
- The gauge should fall 2 mm, or two lines on the gauge, per second.
- Listen for the systolic reading. Note the measurement on your gauge at the precise moment you hear your heartbeat again. This measurement is your systolic reading.
- Systolic blood pressure refers to the force your blood exerts against the artery walls as your heart pumps. This is the blood pressure created when your heart contracts.
- Listen for the diastolic reading. Note the measurement on your gauge at the precise moment the sound of your heartbeat disappears. This measurement is your diastolic reading.
- Diastolic blood pressure refers to your blood pressure in between heartbeats.
- Rest and repeat the test. Let the cuff completely deflate. After several minutes, follow the same steps to take another measurement. If your blood pressure is still high, consider comparing readings with the other arm.
- Mistakes can happen while taking your blood pressure, especially if you are not used to doing it. As such, it is important to double-check your findings by taking a second measurement.
RELATED VIDEO


Share this Post
Related posts
Automatic Blood Pressure Cuff
Amy Dixon has been writing on a local level since 2005, focusing on health and fitness. She is an ACSM Registered Clinical…
Read More
Accuracy of Blood pressure Monitors
High quality and accuracy of blood pressure monitors are crucial for reliable measurement results. In recent years, the number…
Read Morelatest post
-
 Doctors Blood Pressure Monitor February 1, 2025
 -
 Omron RS2 Wrist Blood Pressure Monitor January 26, 2025
 -
 Zero Wrist Watch January 20, 2025
 -
 Automatic Blood Pressure Monitor Price January 14, 2025
 -
 Advocate Wrist Blood Pressure Monitor January 8, 2025
 -
 Sunbeam Blood pressure Monitor January 2, 2025
 -
 Blood Pressure Monitor Automatic December 27, 2024
 -
 Good blood pressure Monitor for home use December 21, 2024
 -
 Blood pressure Gauges December 15, 2024
 -
 Finger blood pressure monitors for home use December 9, 2024